I2C-tiny-usb is an open source USB to i2c (master) interface, designed by Till Harbaum. It has driver in the mainline Linux kernel, but there are drivers for Windows as well. The design is based in Atmel AVR ATtiny45 microcontroller, with bit-banged USB implementation. I use this neat device since years for developing/debugging i2c drivers and reading/writing i2c eeproms directly from my laptop, and after using a version built on universal PCB for years, I’ve decided that it deserves a proper PCB and an enclosure and some more features, so I gave it a redesign, and contributed back to the original project. It’s might be a bit overdone, but this was also a practice project for PCB layout and manufacturing. The core of this version’s schematic pretty much follows the original design, but it has a 3.3V regulator and a level shifter, so it can directly work with 3.3V devices, and it has a LED on the i2c clock line:
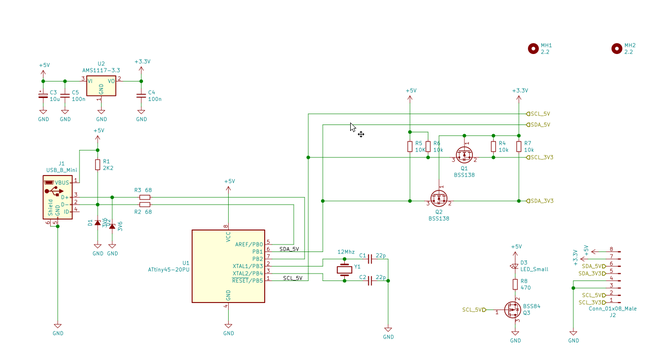
The operation is straightforward, the USB interface and the microcontroller circuit is the original, the level shifter is the classic Philips/NXP application note solution (see: https://www.nxp.com/docs/en/application-note/AN10441.pdf, and I added a switching FET for the LED on the SCL line, so the i2c line activity is indicated.
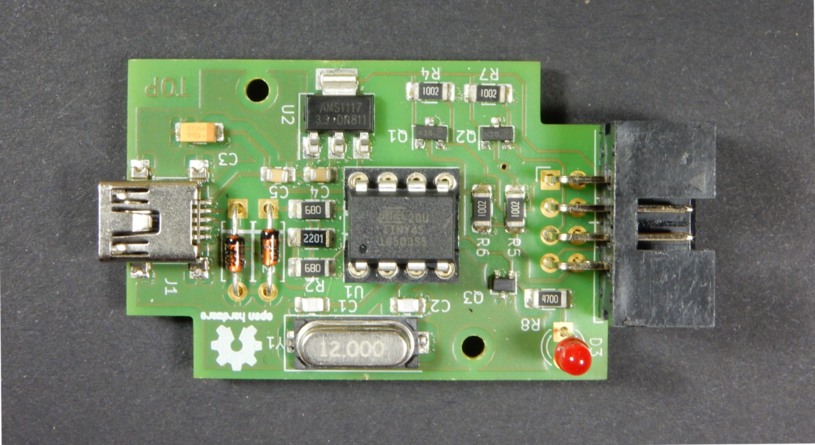
The PCB is designed in Kicad, although it’s double-sided, as the SMD parts are 1206, and there is only one via, it’s possible to build it on a DIY PCB as well. I got my PCB fabricated at Aisler, but as you can see on the cover image, I also made a prototype myself.The fabricated, populated board looks like this:
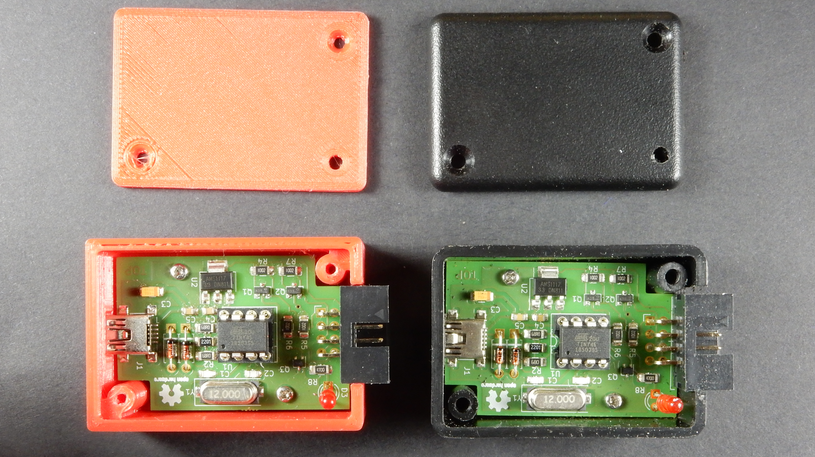
The board is designed to fit into the HM-1551GBK Hammond box, but I’ve also designed a 3D printable enclosure, see in the “enclosure” directory in the git repo and on Thingiverse: https://www.thingiverse.com/thing:4261556. This is how the boards look like in these enclosures:
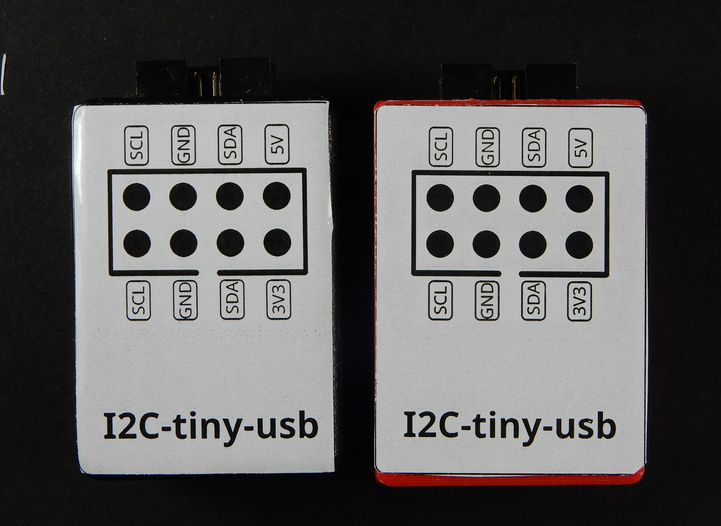
As a bonus, I also made a simple label with the pinout to stick it on the
enclosure:
The Kicad project available in the original i2c-tiny-usb repo at https://github.com/harbaum/I2C-Tiny-USB/tree/master/pcb/i2c-tiny-usb integrated with this pull request, so feel free to build it as it is, or redesign the layout based on the Kicad project.